1)WebAPI määratlus / selgitus, mis see on ja kuidas võtit hankida
Web API on rakenduste programmeerimisliides veebiserveri või veebibrauseri jaoks.
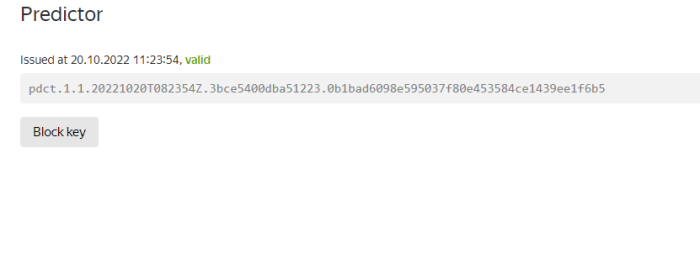
Ma võtan naiteks Yandex We
Me peame Yandexis tokeni saama
Link:
2)Mis on KML / definitsioon / ja kuidas (kirjeldus) oma saidile kaarti koostada. Teie kodune aadress peab olema kaardil
| KML on failivorming, mida kasutatakse geograafiliste andmete kuvamiseks sellistes geobrauserites nagu Google Planet Earth, Google Maps ja Google Maps mobiilseadmetele. KML põhineb XML-standardil ja kasutab pesastatud elementide ja atribuutidega sildipõhist struktuuri. |
Minu kaart
Looge fail kaart.js ja kirjutage sinna see kood:
Html kood:
<!DOCTYPE html>
<html>
<head>
<meta http-equiv="Content-Type" content="text/html; charset=utf-8" />
<title>Примеры. Размещение карты на странице.</title>
<script src="https://api-maps.yandex.ru/2.0/?load=package.standard&lang=ru-RU&apikey=pdct.1.1.20221020T082354Z.3bce5400dba51223.0b1bad6098e595037f80e453584ce1439ee1f6b5" type="text/javascript"></script>
<link href="https://yandex.st/bootstrap/2.2.2/css/bootstrap.min.css" rel="stylesheet">
<script src="https://yandex.st/jquery/1.8.0/jquery.min.js" type="text/javascript"></script>
<script src="map.js" type="text/javascript"></script>
<style>
html, body, #map {
width: 100%;
height: 100%;
margin: 0;
padding: 0;
}
</style>
</head>
<body>
<div id="map"></div>
</body>
</html>Javascript kood:
var myMap;

// Дождёмся загрузки API и готовности DOM.
ymaps.ready(init);
function init () {
    var myMap = new ymaps.Map('map', {
            center:[59.4544927, 24.878115509635922],
            zoom:16,
            type: 'yandex#hybrid'
        }),

        ZoomLayout = ymaps.templateLayoutFactory.createClass("<div>" +
            "<div id='zoom-in' class='btn'><i class='icon-plus'></i></div><br>" +
            "<div id='zoom-out' class='btn'><i class='icon-minus'></i></div>" +
            "</div>", {

            build: function () {
                ZoomLayout.superclass.build.call(this);

                this.zoomInCallback = ymaps.util.bind(this.zoomIn, this);
                this.zoomOutCallback = ymaps.util.bind(this.zoomOut, this);

                $('#zoom-in').bind('click', this.zoomInCallback);
                $('#zoom-out').bind('click', this.zoomOutCallback);
            },

            clear: function () {
                $('#zoom-in').unbind('click', this.zoomInCallback);
                $('#zoom-out').unbind('click', this.zoomOutCallback);

                ZoomLayout.superclass.clear.call(this);
            },

            zoomIn: function () {
                var map = this.getData().control.getMap();
                this.events.fire('zoomchange', {
                    oldZoom: map.getZoom(),
                    newZoom: map.getZoom() + 1
                });
            },

            zoomOut: function () {
                var map = this.getData().control.getMap();
                this.events.fire('zoomchange', {
                    oldZoom: map.getZoom(),
                    newZoom: map.getZoom() - 1
                });
            }
        }),

        zoomControl = new ymaps.control.SmallZoomControl({
            layout: ZoomLayout
        });

    myMap.controls.add(zoomControl, {left: 5, top: 5});
    myPlacemark = new ymaps.Placemark([59.4544927, 24.878115509635922], {
        balloonContentBody: "Tallinn",
    });

    myMap.geoObjects.add(myPlacemark);
}
3.
Minu kaart
Minu kaart –> MapApi
4.
Minu pool valitud WeatherApi
Leidsin Internetist lehe koodi, mis API võtme abil ilma näitab
Kood on võetud sellest saidist -> Click
Ilmateate veebisait, mis kasutab API-võtit WeatherApi